
Building an AI App With Cloudflare Workers
Part 1 of 3 Getting started


Introduction
I’d like to tell you the story of how I built my first AI application using Cloudflare—and honestly, I was blown away by how easy the platform is to use.
While most people know Cloudflare for its CDN and cybersecurity, I dove into its tools for integrating AI models, rapidly prototyping front and backends, and, of course, deploying it all globally.
This post details that entire process: the design, development, and deployment of a serverless application that even includes AI functionality. I’m sharing everything—the successes and the pitfalls I faced while learning the platform. If you are just starting your development journey or building a small services business that will need to scale, I highly recommend checking out what Cloudflare Workers can do for you!
Design
So, what was I actually building? The goal was to create a simple text editor with an AI assistant (using Cloudflare LLM technology) baked right into it, one that could be queried for general review and information.
I was driven by a real-world scenario I’m sure many of us have faced. Picture this:
You’re a student trying to write a compelling university application, or maybe a developer (like me!) trying to draft clear documentation. You write a few paragraphs, but you’re stuck. Are you being clear? Is the tone right?
Normally, you’d have to copy that text, open a new tab, log into a separate AI service, paste it in, write a prompt, get the answer, and then copy it back to your editor. It’s clunky and breaks your flow.
My application was designed to solve that. I wanted a simple tool where you could just highlight your text and ask the AI right there: “Review this for clarity” or “Suggest a better way to phrase this.”
With that core idea in mind, I was ready to start planning the build.
Nailing Down the Scope
The first step in any build, especially a personal project where “feature creep” is a real danger, is defining a clear scope. It’s tempting to dream up a hundred cool features, but a tight scope is what makes a project achievable.
For this project, I wanted to focus purely on the core user experience and the Cloudflare-specific learning. With that in mind, here are the exact features I committed to building for this first version:
Rich text editor that supports markdown syntax
Ability to save, delete, retrieve and modify notes across sessions
Cloud storage to allow for notes to be accessed across devices
AI chatbot that allows general queries from user for writing prompts
Tag that allows for passing the content in the text editor as context to the chat
Streaming response as a data stream to allow for seamless output from the LLM
What I Intentionally Left Out
Just as important as knowing what to build is knowing what not to build. To keep this project manageable, I intentionally left several big features out of scope.
The most significant one was Authentication. Building a full user login system is a massive undertaking. It would have added huge complexity and distracted from the main goal, which was to build the editor and learn the Cloudflare stack so I was advised to skip this functionality.
Other features I avoided for this version included:
Real-time Collaboration: No Google Docs-style shared editing.
Complex File Organization: I stuck to a simple list of notes, not a system of folders and sub-folders.
Detailed Version History: The app would save the latest version, but not every single change. I can always add these in later
By setting these boundaries, I could concentrate on the real challenge: making Cloudflare Workers, AI, and storage all talk to each other.
Designing The Application Architecture
To build the features we’ve scoped, a full-stack application is the best path forward. This just means we’re splitting the app into two parts:
A Front-End: The part that runs in your browser. This is the text editor you type in, the buttons you click, and the chat window.
A Back-End: The logic that runs on a server (or, in this case, on Cloudflare’s network).
You might be thinking, “Couldn’t I just do all of this in the browser?”
Technically, you could try to have the browser talk directly to a database or an AI API. But that approach gets incredibly complicated, fast. More importantly, the entire point of this project was for me to learn and use the full power of Cloudflare Workers, which is a back-end forward technology. A front-end-only app would completely miss that goal.
By splitting the app, we get a clean separation of concerns. The front-end handles the user interface, and the back-end handles the “heavy lifting”:
Taking a note from the front-end and saving it to the cloud database.
Receiving a query from the front-end, securely connecting to the AI model, and then streaming the response back.
The Tech Stack: Why BHVR?
While many frameworks can achieve this, I chose the BHVR (Bun, Hono, Vite+React) stack.
Vite + React: This is for our front-end. React is perfect for building the interactive text editor and chat interface, and Vite is an incredibly fast build tool that makes development a breeze.
Hono (running on Bun): This is for our back-end. Hono is a small, fast, and simple web framework.
The final structure of the project is as listed below.
.
├── client/               # React frontend
├── server/               # Hono backend
├── shared/               # Shared TypeScript definitions
└── package.json          # Root package.json with workspaces
In addition to the full stack frameworks I will be building the text editor using the tip tap library, while the rest of the components are built with a responsive ui in mind, one that scales with the display, which is achieved using tailwind css and shadcn, as it allows for modular pluggable UI components.
Any queries to Cloudflare’s services are handled by an api interface that is built using the hono framework, which allows for handling async requests, with which we can stream AI responses and perform file handling.
Initializing The project
As we are using bun as the main runtime of the project, all commands in this tutorial will assume that you have bun installed in your system. For further details on installing bun, please refer to the docs here. To initialize a BHVR 🦫 project, run the following command in your projects folder.
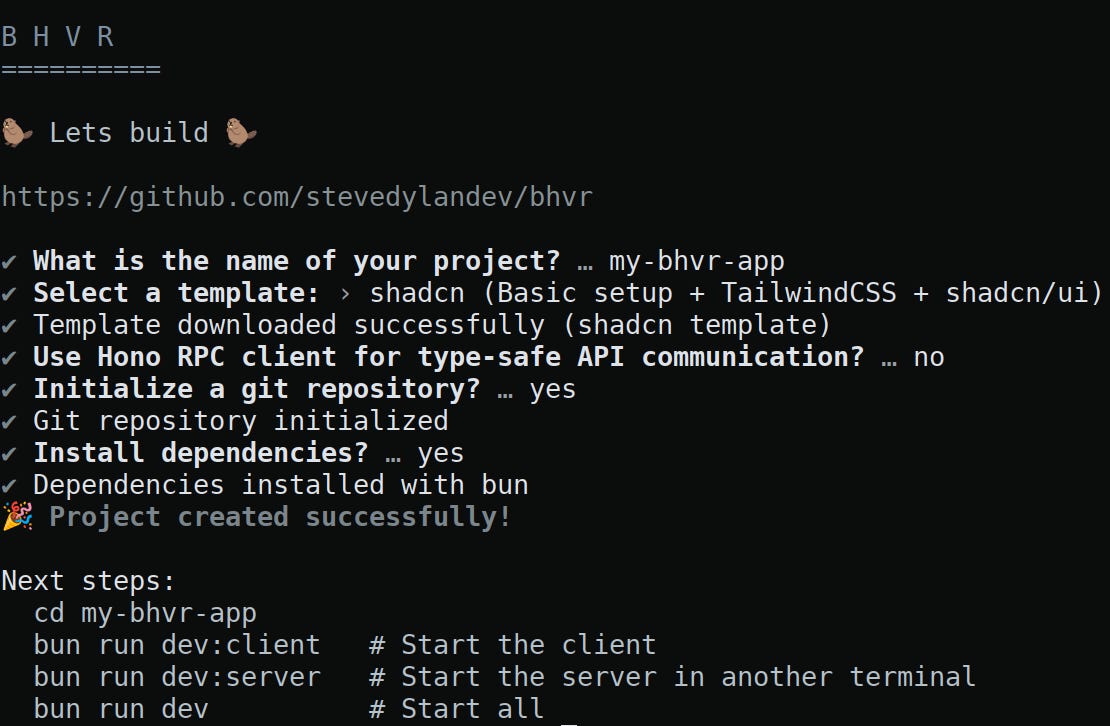
$ bun create bhvr@latestThe terminal will then prompt you to for choices in setting up the project. you should see something like the screenshot below.
After this, you are set to start the project, In the next section, we can start building the frontend.
Theme Toggle and The Sidebar
I started by replacing the starter project page in the client folder such that there are no components displayed except the following in the App.tsx file, it should look something like this.
function App(){
  return (
    <h1>hello world</h1>
  );
  export default App;
}
make sure to change the title tag in the index.html file to your application’s title or the name of your project, along with any other site metadata.
Let us now start with building the sidebar and theme provider for the application. The docs for dark mode in shadcn can be found here. The tutorial gives you a walkthrough of adding a “themeProvcider” and a mode toggle. Add the themeProvider in client/src/components/providers and the mode toggle in client/src/components/ui and update the import paths appropriately. After that, you should be able to toggle light, system and dark mode themes in the web application.
The next component that we are going to add is the sidebar. The first step is to install the component from shadcn.
$ cd client
$ bunx --bun shadcn@latest add sidebar button
With the main editor in place, I needed a sidebar to list saved files and let the user create new ones. I created a new component file at src/components/AppSideBar.tsx.
To speed up development, I’m using a pre-styled Sidebar component from the project’s ui folder (which was added at src/components/ui/sidebar). This is a common workflow: you take a “dumb” UI component and wrap it in your own component to add the specific logic it needs.
Here’s the starting code for the AppSidebar component:
import {
  Sidebar,
  SidebarContent,
  SidebarFooter,
  SidebarHeader,
} from “@/components/ui/sidebar”;
import Header from “@/components/Header”;
import { Button } from “./ui/button”;

export function AppSidebar({
  return (
    <Sidebar>
      <SidebarHeader>
        <Header />
        <h1 className=”text-xl font-semibold leading-6 pt-4 pl-2”>
          Files
          <hr></hr>
        </h1>
      </SidebarHeader>
      <SidebarContent>
        {/* we will display the files here later on. */}
      </SidebarContent>
      <SidebarFooter>
        <Button onClick={}>New File</Button>
      </SidebarFooter>
    </Sidebar>
  );
}
This code is a clean, structural starting point. Here’s what’s happening:
Semantic Imports: I’m importing Sidebar, SidebarHeader, SidebarContent, and SidebarFooter. Using these components ensures my sidebar has a consistent structure and appearance.
Component Structure: The code is very readable because it’s broken into three logical parts:
<SidebarHeader>: This is the top section. I’ve placed the mainHeader(which just has the app’s logo or title) here, followed by a “Files” heading to label the list.<SidebarContent>: This middle section is intentionally left blank. This is a placeholder. Later, once the back-end is working, I’ll pass the list of saved files fromApp.tsxand map over them here to display them.<SidebarFooter>: This bottom section holds our main action button.
The “New File” Button: I’ve added a Button component here. The onClick handler is empty for now. Later, I’ll pass a function (like createNewFile) down from App.tsx as a prop. When clicked, this button will tell the parent App.tsxcomponent to clear the editor’s content and filename, getting it ready for a new note.
Inside the SidebarHeader, I placed a custom <Header /> component. This component, located at src/components/Header.tsx, has two simple jobs: display the application’s brand and provide the theme-switching button.
import { Link } from “react-router-dom”;
import ModeToggle from “./ui/mode-toggle.tsx”;

function Header() {
  return (
    <header className=”relative flex h-24 w-full items-center justify-between bg-secondary rounded px-3 sm:px-8”>
      <Link className=”flex items-end gap-2” to=”/”>
        <img
          src=”../2877073.png”
          alt=”Wratier logo”
          height={40}
          width={40}
          loading=”eager”
          className=”rounded-full”
        />
        <h1 className=”flex flex-col pb-1 text-xl font-semibold leading-6”>
          Wraiter
        </h1>
      </Link>
      <ModeToggle />
    </header>
  );
}

export default Header;
Here’s a practical breakdown of how this component is built:
The Layout (Flexbox is Key): The main <header> tag is our container. The layout is controlled by three Tailwind classes:
flex: This turns the header into a flexbox container.justify-between: This is the magic. It pushes its two children, the<Link>and the<ModeToggle>to the opposite ends of the container.items-center: This aligns both children vertically in the middle of the header.
The Brand Link: I’m using the <Link> component from react-router-dom.
Why a
<Link>? This makes the entire brand identity—both the logo<img>and the “Wraiter”<h1>—a single, clickable element.Clicking it navigates the user back to the root URL (
/), which is the expected behavior for a site logo.
The Theme Switcher: The <ModeToggle /> component is just a simple, self-contained component I imported. Its only job is to handle switching between light and dark mode for the application. Placing it here makes it accessible from anywhere in the app.
Next Up: Building the Back-End
So far, we’ve built a responsive, functional front-end. It looks the part, but it’s all just a facade. That handleSave function is firing requests into the void, and our file list is empty.
In Part 2 of this series, we’ll build the engine. We’ll dive into the “H” of our BHVR stack—Hono—to build a serverless back-end. We’ll set up a Cloudflare Worker, define the API routes for our files, and connect it all to a Cloudflare D1 database. By the end of the next post, our application will be able to save, fetch, and modify notes for real.
 | A guest post by
|