
Building an AI App With Cloudflare Workers Part 2
Part 2 of 3 Connecting to the Back End


In Part 1, we built the complete front-end for our AI-powered text editor. We have a responsive sidebar, a rich-text editor, and all the buttons in place—but it’s currently just a facade. That handleSave function we wrote fires a request into the void, and our file list is empty for a simple reason: there’s no server.
Welcome to Part 2, where we build the engine. This post is all about bringing our application to life by building the back-end. We’ll start by initializing a new Cloudflare Workers project and setting up Hono as our API framework. From there, we’ll create the API endpoints for our files and connect them to a Cloudflare D1 database. By the end of this article, our app will be able to create, read, and save notes for real.
Writer and AI chat UI
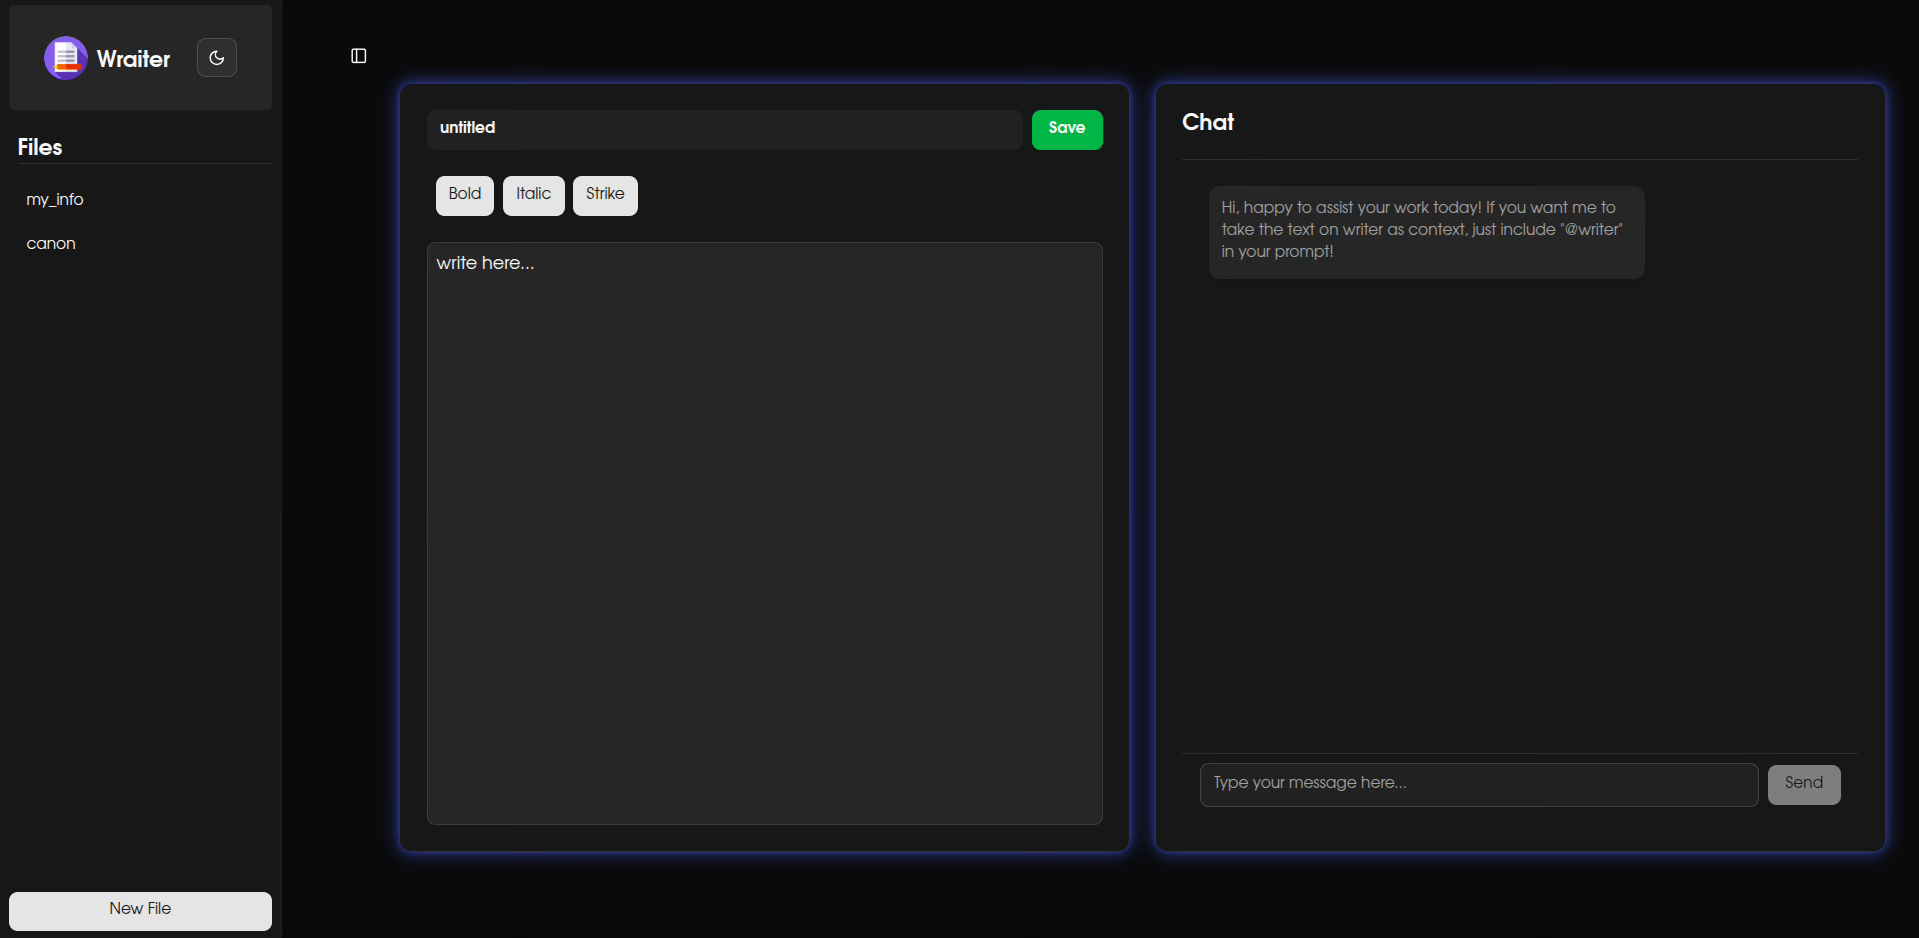
The next step is to build the text editor and the AI chatbot UI components. The text editor is built using the tiptap library, and the rest using shadcn components. To begin, we’ll install the necessary components using bun.
$ cd client
$ bun install @tiptap/react @tiptap/pm @tiptap/starter-kit
$ bun shadcn@latest add sonner input scroll-area separator
Using the file writer.tsx in src/components we then start building the writer component as the code given here.
The writer must have a few props defined which corresponds to the content, save state, filename and the file id of the currently open field in the writer. Upon fetching a file from the sidebar, the file contents must be displayed in the writer, or when the save button is clicked, the current filename and the file contents must be saved to the database. These actions require us to maintain states for the related sub-components. Hence, the need to define props and states.
All application state, including the note content, will be managed within the main App.tsx component. This centralized approach is critical for passing the editor’s content as context to the AI chat.
While we will define the full API functionality later, we’ll stub out the necessary API calls (like saving notes) for now. We’ll assume the API’s base URL is defined in a .env file, but we’ll use dummy links as our main focus in this section is building the UI.
const editor = useEditor({
  extensions: [starterKit],
  content: content,
  editorProps: {
    attributes: {
      class:
        “prose prose-blue dark:prose-invert max-w-none focus:outline-none min-h-[150px] p-2”,
    },
  },
  onUpdate: ({ editor }) => {
    // Notify parent when editor content changes
    onContentChange(editor.getHTML()); // Pass HTML content back to App
  },
});
The code above is the instance of the editor where it takes the input of the content. The onUpdate field will update the content to the parent editor as it changes. The rest of the “class” attributes defined within this instance style the component to be responsive to the display device. This instance is then later used within the returned tsx structure in the file.
  const handleSave = async () => {
    if (!editor) return;
    setSaving(true);
    const editorContent = editor.getHTML(); // Get HTML content from the editor

    // Basic validation
    if (!filename.trim()) {
      toast.error(”Filename cannot be empty!”);
      setSaving(false);
      return;
    }
    if (!editorContent.trim()) {
      toast.error(”Document content cannot be empty!”);
      setSaving(false);
      return;
    }

    try {
      const res = await fetch(`${API_URL}/files`, {
        method: “POST”,
        headers: { “Content-Type”: “application/json” },
        body: JSON.stringify({
          title: filename, // Use the filename from the input
          content: editorContent,
        }),
      });
      const data = await res.json();
      if (data.success) {
        toast.success(”File saved successfully!”);
        onSaveComplete(); // Notify App.tsx to re-fetch files
      } else {
        toast.error(data.error || “Failed to save file.”);
      }
    } catch (e) {
      console.error(”Error saving file:”, e);
      toast.error(”Failed to save file. Network error or server issue.”);
    } finally {
      setSaving(false);
    }
  };
The handleSave function deals with saving the content once the save button is pressed, by first validating that the content is not empty, and then bundling the filename and content as a json and passing it as the body while issuing a post request to the backend at the /files endpoint, so that it can be saved in the D1 database later on by the backend.
Now, the next steps involve in creating the AI chat UI. create a file AiChat.tsx in src/components and follow along the code given here. Similar to the writer, we shall also assume here that AI responses to queries are being passed as a stream of data from the backend endpoint /aichat
The Message is a custom UI component that is as described below. It is placed in Message.tsx in src/components/ui
import { Loader2 } from “lucide-react”;
import ReactMarkdown from “react-markdown”;

interface MessageProps {
  role: “user” | “ai”;
  content: string;
  isLoading: boolean;
}

const Message: React.FC<MessageProps> = ({
  role,
  content,
  isLoading,
}: MessageProps) => {
  const isUser = role === “user”;
  return (
    // ‘justify-end’ for user, ‘justify-start’ for AI to align messages to sides
    <div
      className={`flex items-start gap-3 p-2 ${
        isUser ? “justify-end” : “justify-start”
      }`}
    >
      <div
        className={`max-w-[70%] rounded-lg p-3 shadow-md ${
          isUser
            ? “bg-primary text-primary-foreground” // Shadcn primary button colors for user messages
            : “bg-muted text-muted-foreground” // Shadcn muted background for AI messages
        }`}
      >
        {isLoading ? (
          <div className=”flex items-center space-x-2”>
            <Loader2 className=”h-4 w-4 animate-spin” />
            <span>Thinking...</span>
          </div>
        ) : (
          <div className=”text-sm break-words”>
            <ReactMarkdown>{content}</ReactMarkdown>
          </div>
        )}
      </div>
    </div>
  );
};

export default Message;
Continuing with the AI chat, the main function to focus here will be the handleSendMessage function, which handles with fetching the AI responses. With the helpo of AI Agents in Cloudflare, we can stream the AI responses to better simulate the chat funcitonality so that the user does not have to wait for the backend to collate the data completely before sending the response to render in the frontend, but rather send the data as a stream of bytes. Assuming that we are getting the response as a stream of string from the /aichat endpoint, we code the handleSendMessage as such represented in line 41 in the link given.
The function first clears the input field and stores the user prompt. If the message contains the key “@writer”, it includes the writer content passed to it via props as context, if not, then the context is empty. A state is maintained for the previoulsy updated message to the interface, the current message recieved and the loading state. The response is contantly refreshed by storing the response in a buffer and then displaying it by updating the state maintained by prevMessage and then continuing to wait for the next stream of messages by deading the buffer until the done state is set to “true”. All external error cases are then handled by a catch field at the end. With this, the UI is finally complete. We can move on to the backend and start building with cloudflare workers.
Next Up: Integrating AI (Part 3)
We now have a fully functional, full-stack application. We can create, read, update, and delete notes, with all our data persisting in a Cloudflare D1 database.
But we’re still missing the “AI-powered” part of the promise.
In Part 3, the final part of this series, we’ll bring our application to life. We’ll dive into Cloudflare’s AI ecosystem, create a new API endpoint, and use Hono’s streaming capabilities to send our editor’s content to an LLM and stream the response back in real-time.
 | A guest post by
|